Top Tips for Using a Flashlight in Outdoor Survival

Time:2026-10-14 Author:Madeline
0%

A flashlight is more than a source of light during an outdoor emergency. It can guide your steps, signal rescuers, and reveal hazards near your shelter. A reliable model also reduces stress when daylight disappears behind a ridge. How to use a flashlight effectively in outdoor survival situations? The answer depends on preparation, light control, and sound judgment.

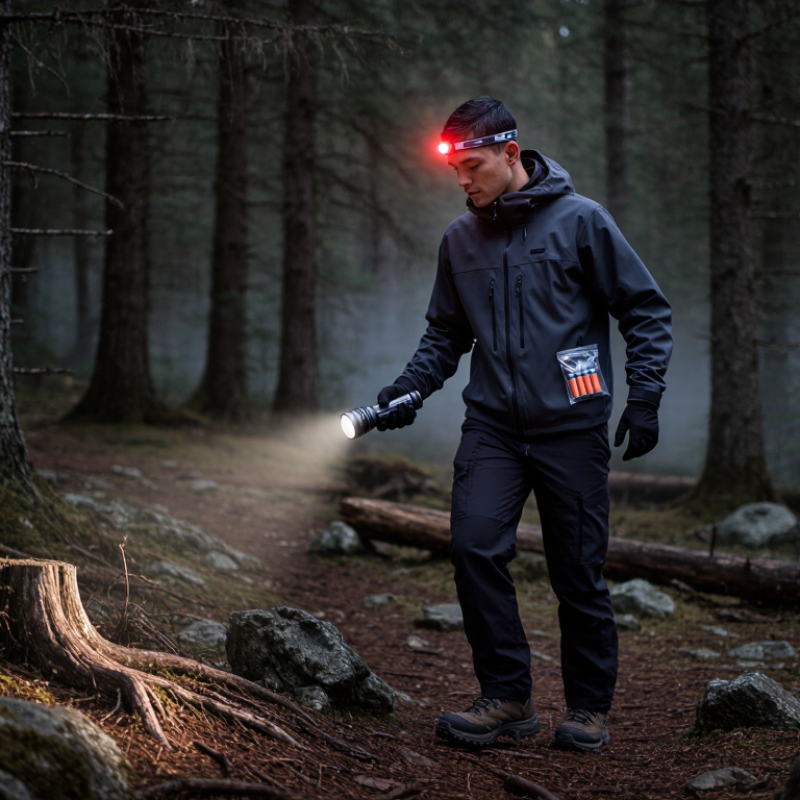
Choose a flashlight with a strong grip, weather resistance, and simple controls. Test it before every trip. Carry spare batteries in a sealed plastic bag, because cold temperatures can weaken battery performance. Keep the light where you can reach it quickly, even while wearing gloves. A headlamp leaves both hands free for climbing, cooking, or treating a minor injury. Red light can protect night vision around camp, although it may not reveal distant hazards clearly.

Use short beams when checking a trail, then scan slowly across rocks, branches, and uneven ground. Avoid staring into another person’s eyes. It can temporarily damage their night vision. Signal with repeated flashes only when needed, and conserve power between checks. Three flashes. Then pause. That pattern may be easier to recognize than random movement.

Practice matters. Try changing batteries beside your tent in darkness. You may discover awkward switches, weak clips, or poor grip before they become serious problems. Trusted outdoor safety guidance consistently emphasizes backup lighting, energy conservation, and calm decision-making. Still, no flashlight replaces a map, warm clothing, navigation skills, or a realistic trip plan. Small mistakes happen. Review them honestly, and improve your system before the next journey.

Top Tips for Using a Flashlight in Outdoor Survival

Choosing the Right Flashlight for Outdoor Survival

Choosing the Right Flashlight for Outdoor Survival

A survival flashlight should match your route, weather, and battery plan. The 2024 Outdoor Participation Trends Report recorded 175.8 million U.S. outdoor participants in 2023. That scale shows how varied outdoor lighting needs have become. A short trail needs less power than a remote overnight trip.

Start with measured performance, not impressive advertising. ANSI/PLATO FL 1-2019 defines tests for brightness, beam distance, runtime, impact, and water resistance. Runtime ends when output falls to 10 percent of its starting level. Check that detail. A “ten-hour” claim may not mean ten useful hours.

For general hiking, 150 to 300 lumens can illuminate nearby ground without quickly exhausting batteries.

Higher output helps with distant landmarks, but it often creates glare and drains power faster.

Weather protection matters.

IEC 60529 classifies ingress protection ratings, while IPX4 indicates resistance to splashing and IPX7 covers temporary immersion up to one meter. Choose a sealed body, protected switch, and a lanyard large enough for gloved hands.

I once selected maximum brightness and regretted it after one cold night. Cold reduces practical battery performance, especially when batteries are already partly depleted. Test the flashlight outdoors before depending on it. Carry spare batteries in a dry pouch, and check the switch with wet hands. Small details matter.

Preparing Batteries and Backup Lighting Before Departure

Before departure, test every flashlight in darkness, not just in daylight. Install fresh batteries, then check the switch, lens, and charging port. Ready.gov emergency-kit guidance recommends a flashlight and extra batteries. I carry spares in a sealed plastic pouch, away from coins and keys. Metal contact can create unwanted heat. Keep battery types matched. Do not mix old and new cells, or different chemistries. That mistake is easy to make.

Tips: Write the installation date on a small piece of tape. Store spare batteries inside their original packaging. For rechargeable lights, charge them fully and test them again before leaving. Cold weather can reduce battery performance, so keep the backup cells inside an inner jacket pocket. A headlamp leaves both hands free for climbing, cooking, or map reading. Pack a second light separately. It should not depend on the same battery system.

The U.S. Department of Energy reports that LED lighting uses at least 75% less energy and lasts up to 25 times longer than incandescent lighting. That efficiency helps, but runtime claims still need practical testing. The ANSI/PLATO FL 1 standard measures flashlight runtime until output falls to 10% of its initial level. In camp, I mark the tested runtime on my gear list. My own error was trusting a nearly empty rechargeable light after a short test. It failed during a windy night. A backup lantern with fresh cells would have prevented that uncomfortable lesson.

Using Light Signals and Beam Control in Emergencies

In an emergency, a flashlight can speak when your voice cannot. Use three short flashes, three long flashes, and three short flashes for the widely recognized SOS pattern. Pause between groups so the signal remains clear. Repeat it only when you have enough battery power.

Beam control matters as much as the signal itself. Aim a narrow, bright beam toward an open ridge, trail, or rescue aircraft. Sweep slowly from side to side, rather than waving randomly. A wide beam helps you inspect nearby ground, exposed roots, and steep edges. A low setting protects night vision and preserves power. Avoid shining directly into another person’s eyes.

In field practice, I have learned to signal from a stable position. Wet hands, cold fingers, and panic can cause mistakes. I once changed modes too quickly and lost valuable seconds. That mistake taught me to check the switch before moving. Cover part of the lens with a hand to soften the beam inside a shelter. Use reflective clothing, a metal bottle, or a pale rock to spread light farther. Keep the flashlight above head level when signaling from a visible clearing. If rescuers answer, stop flashing briefly and watch for their direction. Battery readings are not always accurate in freezing weather, so carry spare power and test the light before leaving.

Managing Flashlight Power During Extended Outdoor Trips

Managing flashlight power becomes critical when an outdoor trip lasts several nights. I plan for darkness, not optimism. For a four-night trip, I estimate two hours of use each evening, then add at least 50 percent reserve. The ANSI/PLATO FL 1 standard measures flashlight runtime until output falls to 10 percent of its initial level. That final dim period is rarely useful on a trail.

Cold changes everything. Battery performance can drop in low temperatures, especially during winter camps. I keep spare batteries in a sealed pouch inside an inner clothing pocket, not in an exposed backpack compartment. Rechargeable cells should begin near full capacity, while disposable cells should remain sealed until needed. Never combine old and new cells, or different chemistries. Keep it simple.

On a recent overnight hike, my first estimate was wrong. I used high output for navigation and wasted most of the reserve before midnight. Now I use the lowest practical setting, switching to brighter output near steep ground or water crossings. I also test the flashlight at home for the planned duration, including its charging cable and backup light. The Outdoor Foundation’s 2024 Outdoor Participation Trends Report recorded 175.8 million U.S. outdoor participants in 2023, showing how many people depend on small equipment during extended trips. More participation also means more careless assumptions. A written power plan feels excessive, but discovering darkness at 2 a.m. feels worse.

Maintaining and Storing Your Flashlight After Use

A flashlight earns trust through small maintenance habits after a trip. I wipe mud, salt, and moisture from the body with a clean, dry cloth. The lens needs gentle cleaning, because grit can create fine scratches. I also inspect the switch, battery cover, threads, and sealing ring for damage. A loose seal can let water enter during the next storm.

Remove disposable batteries before long-term storage. This prevents leakage from damaging the contacts and internal parts. For rechargeable models, follow the manufacturer’s charging guidance and avoid storing a fully depleted battery. Keep the flashlight in a cool, dry place away from direct sunlight. Do not leave it loose beside keys or tools. Metal objects can bridge the contacts and create heat. A small pouch or separate compartment works better.

After cleaning, I briefly test the light and check for flickering. I once skipped this step, then found a weak connection during an evening walk. That mistake was avoidable. If the contacts look dull, use a dry cotton swab first, without forcing debris deeper. Check the sealing ring for cracks, flattening, or dirt, and replace damaged parts with compatible ones. Apply only the lubricant recommended for that seal. Too much grease attracts dust. Every few months, I test the stored flashlight again, even when it seems untouched.

Top Tips for Using a Flashlight in Outdoor Survival - Maintaining and Storing Your Flashlight After Use

Maintenance or Storage Task Recommended Timing Practical Method Why It Matters Important Precaution
Turn the flashlight off Immediately after use Check the switch before placing it in a pack or storage container. Prevents accidental battery drain and heat buildup. Do not rely only on a lockout feature unless it has been tested.
Inspect the body and lens After every outdoor trip Look for cracks, dents, loose parts, clouding, or damaged lens covers. Damage can reduce brightness and compromise water resistance. Replace damaged sealing components before using the light in wet conditions.
Remove dirt and grit After dusty, muddy, or sandy use Wipe the exterior with a soft, slightly damp cloth; use a soft brush around threads and switches. Debris can prevent proper sealing and make the switch stick. Avoid abrasive cleaners, solvents, and high-pressure water.
Dry the flashlight completely Before storage Dry it with a clean cloth and allow trapped moisture to evaporate in a ventilated area. Reduces corrosion and helps protect internal electrical contacts. Do not use intense heat, an oven, or a hair dryer on high heat.
Check the battery compartment Monthly and after heavy use Inspect for moisture, corrosion, damaged contacts, or unusual residue. Early detection helps prevent leakage damage and unreliable operation. Wear gloves when handling leaked batteries and follow local disposal rules.
Remove disposable batteries for long-term storage When unused for about one month or longer Take the batteries out and store them separately in a dry, protective case. Helps limit damage from battery leakage or accidental activation. Never mix old and new batteries or different battery types.
Recharge rechargeable batteries safely After use, according to battery condition Use the correct charger and follow the battery maker's charging instructions. Proper charging supports battery life and reduces safety risks. Stop using batteries that are swollen, cracked, leaking, or unusually hot.
Clean and protect the threads Every few months or after muddy use Remove debris gently and apply only a small amount of suitable lubricant if specified in the instructions. Clean threads help maintain a secure connection and seal. Keep lubricant away from the lens, switch, and electrical contacts.
Store in a cool, dry place During all periods of non-use Keep the flashlight away from direct sunlight, standing water, and extreme heat or cold. Stable conditions help protect batteries, seals, plastics, and electronic components. Do not leave it in a hot vehicle or an unprotected damp shelter.
Prevent accidental activation Before packing or transporting Use the lockout setting, loosen the tail cap slightly when appropriate, or place the light where the switch cannot be pressed. Prevents overheating and preserves emergency battery power. Restore normal operation and test the light before the next trip.
Test emergency readiness Every month and before a trip Check the beam, switch, battery level, spare batteries, and charging cable if applicable. A short test confirms that the flashlight will work when needed. Carry spare batteries that match the flashlight and keep them protected from short circuits.

FAQS

What flashlight pattern is widely recognized as an emergency signal?

Use three short flashes, three long flashes, and three short flashes. Pause between groups. Repeat only when battery power allows.

Where should I aim a flashlight during an emergency?

Aim a narrow, bright beam toward an open ridge, trail, or rescue aircraft. Sweep slowly from side to side.

When is a wide beam more useful?

Use a wide beam to inspect nearby ground, exposed roots, and steep edges. It helps reveal hazards close to your feet.

How can I protect my night vision and battery?

Use the lowest practical setting. Increase brightness near steep ground or water crossings. Brightness is not always better.

What should I do if rescuers answer my signal?

Stop flashing briefly and watch their direction. Keep your position stable. Avoid shining directly into anyone’s eyes.

How can I signal from inside a shelter?

Cover part of the lens with your hand to soften the beam. Reflective clothing, a metal bottle, or a pale rock can spread light farther.

How much flashlight power should I plan for a four-night trip?

Estimate about two hours of use each evening. Add at least 50 percent reserve. Darkness ignores optimistic planning.

How should I store spare batteries in cold weather?

Keep them sealed inside an inner clothing pocket. Avoid exposed backpack compartments. Cold can reduce battery performance.

Can I mix different batteries in one flashlight?

Do not mix old and new cells. Avoid mixing different battery chemistries. Keep the setup simple.

How can I test a flashlight before leaving?

Run it for the planned duration at home. Test the charging cable and backup light too. I once trusted a poor estimate and regretted it.

Conclusion

Choosing the right flashlight is an important part of outdoor survival preparation. Select a durable, weather-resistant model with a comfortable grip, suitable brightness levels, and simple controls. Before departure, test the flashlight, install fresh batteries, and pack extra batteries or a reliable backup light in a waterproof container. How to use a flashlight effectively in outdoor survival situations? Use a focused beam to inspect trails, equipment, and surroundings, while a wider beam is better for nearby tasks. In emergencies, flash in a steady, recognizable pattern and use controlled signals to attract attention without wasting power.

During extended trips, conserve energy by using the lowest brightness that meets your needs, turning the light off whenever possible, and carrying it where it is easy to reach. Protect the flashlight from moisture, drops, and extreme temperatures. After use, clean and dry it thoroughly, remove batteries if it will be stored for a long period, and check its condition before the next adventure.

Madeline

Madeline

Madeline is a dedicated marketing professional with a wealth of expertise in our company's core offerings. With a keen understanding of the industry, she brings a unique perspective to her role, consistently delivering high-quality content that highlights the superior aspects of our products. As......